The latest module on A Year With My Camera has been about macro photography.
And it's here that I've found the limitations of my camera (which, as a reminder, is a Canon G7 X).
I simply can't either physically get my camera close enough, nor can I zoom in sufficiently close, to get a really closely framed shot.
I experimented with changing the ISO/f-stop/shutter speed to let more light in - and the reverse - but I really wasn't able to get close enough to capture the detail in the inspiration shots from AYWMC.
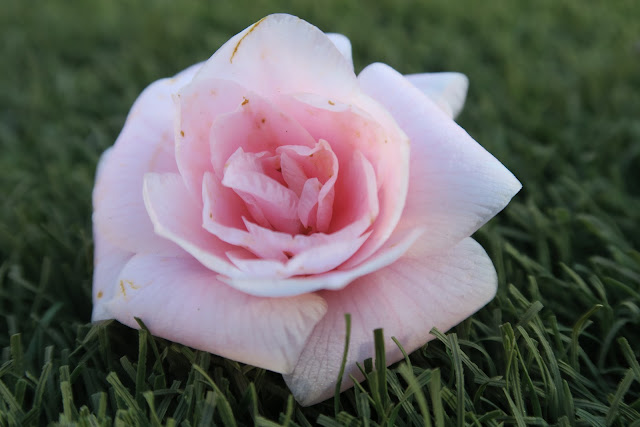
Ultimately, I ended up with a series of images, mostly of uninteresting camelias - too close to get any interesting effect with depth of field, and too far away to get the lovely detail of the flowers.
Showing posts with label AYWMC. Show all posts
Showing posts with label AYWMC. Show all posts
Sunday, 15 October 2017
Sunday, 10 September 2017
AYWMC 30 day challenge
For the month of August I took part in the A Year With My Camera (AYWMC) composition challenge. After falling behind with the weekley prompts and homework during our move back to Australia, I landed onthis daily challenge as a great way to get back in the habit of trying each week's homework.
It was also a good opportunity to pay atttentionto composition and to take photos on days other than the weekend. I can't be the only one who thinks about her camera on Saturdays and Sundays right...
Over the course of the month - well, 30 days, as 31 August was a day off - I only missed 1 day, when I was quite unwell and didn't get out of my PJs.
I added an extra lawyer to the challenge by restricting myself to taking photos on my way to and from work, or on my lunch breeak, rather than going somewhere specifically to take photos. This presented particular challenges on some days - like the S curve day - where I had to rely on my surroundings to assume the right form. Luckily, I came across some benches laid out in a snake shape on my walk home (not the usual way).
A real highlight of the challenge was the daily wrap up - 4 photos chosen as highlights of that day's chllenge. I was fortunate enough to have 2 photos chosen. The first was to represent mystery, and the prompt was 'what's leaving the frame'.
The prompt for the second was 'mono'.
Towards the end of the month I was running out of steam and really had to push myself to complete the final few days. Ultimately, it was a great way to get back to the AYWMC program and I'm looking forward to the next weekly challenge.
Monday, 20 March 2017
Composition rounds 2 and 3
I much prefer the artistic, or creative, challenges –
rather than the technical!
Rule of thirds / Odd numbers / Diagonals
You need to imagine your frame has been divided into a
3x3 grid – not quite square, as your frame isn’t. Then the challenge is to try and place the
subject on those lines. A connected
concept is the idea that humans prefer odd numbers, so if you are going to have
multiple objects forming the subject, then you should aim to have 3 or 5 of the
object. In this photo of the squirrel
you can see that he almost on the left vertical ‘third’ line.
The other connected concept is the idea of taking photos
that contain diagonal lines, which tend to create a dynamic image. I really like to use this when taking photos
of buildings, to really give the impression of the building soaring into the
sky.
Leading lines / frames /
ring of light
An easy way to focus attention on a subject is to
visually lead the eye to it. One way is
through the use of lines – more commonly you may use the footpath, or a road,
but in this image the line of the cannon neatly directs you to Geoff’s lovely
face!
Another way to is to create a frame within the image –
like this image of me standing in the doorway in a side street in Krakow. It would be even more effective if the image
was of me through the doorway, but I wasn’t just going to let myself in.
Another version of a frame is to surround the subject
with a ring of light – not in the 1980’s way of creating a halo and minimising
wrinkles, but ideally to maintain the colour accurately and highlight the
subject. This one is easier in natural
light, but I had fun trying to create the effect with a street light and a shrub.
Background separation
I’ll take any excuse to play with depth of field when
taking photographs – and my camera actually defaults to that when on the auto
setting if the subject is far enough forward of the background (and close
enough to the camera). Blurring the background in this shot really draws
attention toblossoms.
Thursday, 9 March 2017
Composition exploration – the basics
After a few weeks of very technical emails, which I muddled
through with varying degrees of success, I was pleased that A Year With My
Camera has started a 4 week focus on composition. I have studied it in the past, but Emma
presented the first week in a way that I had never considered – focussing on
the background, foreground and subject.
My previous thoughts on composition have been guided by
geometry, and looking at the relative heights of the different elements of the
image, so I initially found the descriptions of ‘more foreground’ or ‘more
background’ a little confusing. I found
it more helpful to think about the percentage of the frame that the background
or foreground should fill (‘more’ meaning a higher percentage). The challenge
was to take 5 images, and focus on moving your feet to achieve them rather than
moving your feet!
A balanced image
A lovely, though boring, image of Geoff on the path beside
the Kelvin river.
Mostly subject
Up close in the Glasgow Botanic Gardens glasshouses on a
beautiful flower from a plant native to Indonesia.
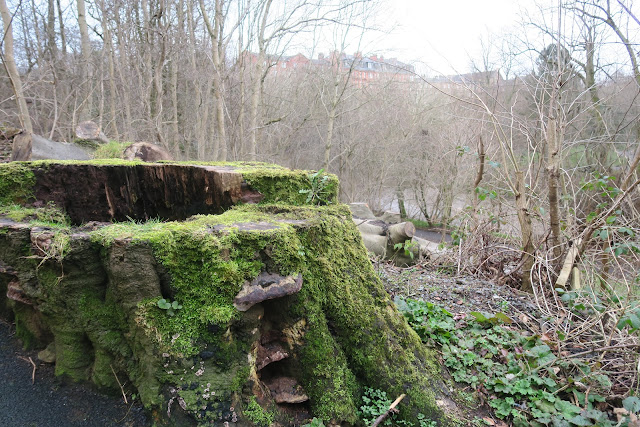
Mostly background
Again beside the river, the mossy stump is the subject and
while I usually would have framed the image to crop our the path in front, I
deliberately left a little in the corner of the image to clearly have some
foreground.
Mostly foreground
A windswept Geoff on the upper deck on the ferry out to Lerwick, Shetland Islands (and the wind was impacting me as well, hence he is a little blurry! The sunse over Aberdeen was spectacular.
No foreground
I guess a flatlay is a good example of no foreground, but I
am not sure how technically these are shot – but the opposite of a flatlay is
looking straight up, so I flipped about the screen on my camera so I could see
the shot and took the image straight up in the Glasgow Botanic Gardens
glasshouses
Wednesday, 1 February 2017
Bus smudges
The photography challenge over the weekend was to
experiment with shutter speeds.
This isn’t something I’ve really tried before – and before
I read the AYWMC email, I didn’t have a clear understanding of the effects that
could be achieved.
My old camera had a setting that allowed the shutter to
remain open while my finger was on the button, but I didn’t really use it.
This camera has shutter speeds as slow as 15 seconds (by
the way, is anyone else confused as to why the symbol for seconds is the same
as the symbol for inches), and super, super fast – too fast for the amount of
light I had available to me on Friday night, standing at the base of Nelson’s
column in Trafalgar Square.
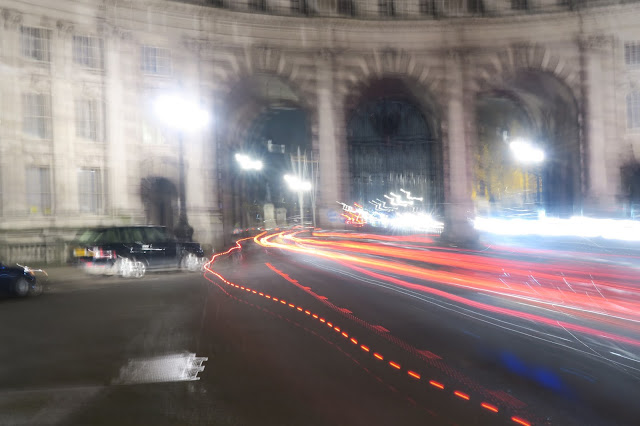
I experimented with buses and traffic, going towards Big
Ben, under the Admiralty Arch, and then side on, to get some bus smudges.
There was a trick – the bus had to be moving quickly
enough for this to work – that is, enter and exit the shot area while the
shutter was open, which meant only shooting while the bus was coming at a green
light.
Then I had to think about framing, and trying to exclude
some of the traffic signage from the shots. I really want to try this again with sparklers – a long
shutter speed is how to capture messages ‘written’ in sparklers.
Thursday, 26 January 2017
Bokeh is so trendy
Aperture, ISO and shutter speed are terms that I used to
throw around, back when I knew how to use an SLR camera (yes, an SLR not a
DSLR)! What I remember now is that all 3
need to combine to produce a properly exposed and focussed image (proper being
subjective of course).
I was pleased that this weekend’s homework was related to
aperture – or f-stop as I was taught to call it (in the late 1990s). Aperture
is the size of the hole in the lens, which regulates how much light is let in,
and the key thing I need to commit to memory is that smaller number = bigger
hole – sometimes the smaller number is described as a ‘wider aperture’ which I
find helpful.
The precise challenge issued by AYWMC was to take 2
photos exactly the same, only changing the aperture – the first image at the
largest number aperture which is 11 for me, and the second at the smallest
number. Interestingly, the smallest
number ranged between 1.8 and 2.8 for me, and I am not sure why it varied.
Geoff and I both had a go at this challenge – while I am
the photography fiend in the family, it’s also nice to have photos of me in it
(other than just selfies), so it’s great that he’s joining in. As I mentioned
in a previous post introducing this challenge, I loved the photos of my
grandparents travels, but my pa wasn’t in many of them – too busy being the
photographer – and I’m keen to avoid that for myself.
Blossom with aperture set at f11
Blossom with aperture set at f2.5:
If only the sky were bluer...
Friday, 20 January 2017
When you look closely, there’s a lot of brown in grey
Another challenge for 2017 – to get off the auto function
of my camera! I followed an Instagram
rabbit hole and landed on Emma Davies’ ‘A Year with my camera’ (AYWMC)
and decided to try the challenge, though I don’t have a DLSR, but my point and
shoot is quite sophisticated – a Canon GX 7.
The aim of the challenge is to take photos of your daily life, not just the
big events, and learn to use your camera at the same time.
I did study photography in high school, including in my
final year (where I think it was my best or second best subject out of the 5 I
took in year 12). This was back in the
day where I actually processed film! The
skills I learned then, particularly about composition and framing, are still
relevant, but the technical side is long since obsolete.
The first step of AYWMC was to think about what kind of
photos I want to take for the year. This is the second year that Emma has run
the challenge, and last year’s included themes for each week to guide the
technical homework, but this year is up to the participant. My focus for the year is to capture images
that can immerse someone in my London life.
I used to love looking at the old pictures at my grandparents house. They travelled all over Asia for my pa’s job,
and there were some great pictures of food, and the sights, and my grandma
enjoying them (pa was the photographer). My favourite part (other than the
photos of my young grandma) was that I felt that I could get a good sense of
their travels, as the daily tasks of life were included.
The first set of homework was focussed on exposure (and
grey). Emma helpfully set out a lot of
technical information about how a camera (on auto) determines the correct
exposure – that is, how much light the camera lets in to capture the
image. Long story short, a camera
assumes an image will be 18% grey. This
means, if you take a photo at night you can get quite a grey effect, even
though reality may be much closer to black. I took a terrible photo that exemplifies this in Berlin.
The challenge was then to take some grey photos. And try to create a beautiful image that is
just grey.
Looking closely at grey, I began to notice how many other
shades of brown and blue really come together to create a colour that reads as
grey.
Subscribe to:
Posts (Atom)


